Alot of people would love to have that custom closet look but usually pump the breaks at the custom closet price. Getting professionals to install a custom closet can range anywhere from $3,000 to $20,000 depending on the size of your closet. This is usually the reason some may decide to go with a closet system because they are pretty easy to install, and you can eliminate the builder's labor. But what about longevity? Longevity is the wild card when it comes to closet systems. This is why I think building a custom closet with real plywood and not particle board is the smartest route to take. So, with that being said let's get into this closet!

List of Tools
Other Supplies Used
First things first, take into account everything you need in your closet space, for instance if you have a large collection of sneakers you may want to designate a wall especially designed to showcase your sneakers. For this particular closet the request was simply a dresser, a cabinet, and shelving. I grabbed an unfinished dresser and cabinet to make this build easier on me (best decision ever) and with those dimensions in hand I took measurements of the closet and began to sketch out the closet design. Once the closet design was completed, I then began to create a list of lumber that would be needed for this build out. And off to the hardware store we go!

Once you have your design figured out and lumber cut its time to clear out the closet. You will of course need to remove all racks and hardware from the walls. If removing carpet like I did for this build you want to take time to remove all of the annoying glue from the carpet padding and those pesky tack strips. Once you're done your space will look something like this...

Now that you have that out of the way it's time for the fun part! Let's get to building! I start alot of my builds with the base because this gives my builds a firm foundation to stand on and it acts as the perfect piece to anchor trim. I like to put the base together using pocket holes because it's a cleaner process vs screws that may or may not sink into the wood. Once you have your base together it should look something like this...

Next, it's time to move on to the plywood. If/when you have your wood cut at Home Depot (a hardware store) these are cuts that you would have ready to install. This closet was a tad shorter than the 96" so I had to cut a few inches off but once installed i had the perfect base!

After adding the plywood to the base, I added the unfinished dresser and cabinet and began to build around it. I secured the 3/4" plywood to the base, dresser and cabinet. And when adding the plywood directly to the wall I made sure to add liquid nails to help ensure a firm grip. Once you have your verticals up you can simply go in and began to add the shelves. I secured all of my shelves with pocket holes making sure to flip the wood to the side where the pocket holes are less noticeable. The shelves can also be assembled in a garage or an outdoor space however I found it easier to build as I go in the closet. Besides, I'm a small woman and carrying shelving that are bigger than me isn't typically what I would call fun. LOL
Pro Tip: While adding the shelving you want to make sure that its level and all of the wood is flush. This will ensure a seamless finish!

Pro Tip: Use scrap 2x4s as spacers to ensure shelves are level. This works like a charm!

After putting the design together, I filled all of the holes I created when removing the wire racks with spackling and allowed it to dry. The drywall spackling that I used goes on pink and dry white, so while I waited I began to install the trim. I used a 1" thick pine wood for the trim and this took it up a notch! This gave me that custom look i was looking for and boy was I happy!
Once the spackling was dried and the trim was installed it was time for some good ole boring sanding. I started with a 180 grit then finished it off with a 220 grit. Once finished it looked a little something like this.


After sanding for what may seem like an eternity, you want to make sure that you take your time and clean up all of the loose sand in the space. Once completed you will go in with your caulk and give the closet an even more seamless look.
And finally, it's time to paint. You want to start with a good primer and allow it to dry for the specified dry time. Then go in with your paint of choice. I did 2 coats however you should determine how many coats you need. According to the paint and how the color looks you may need less or more.
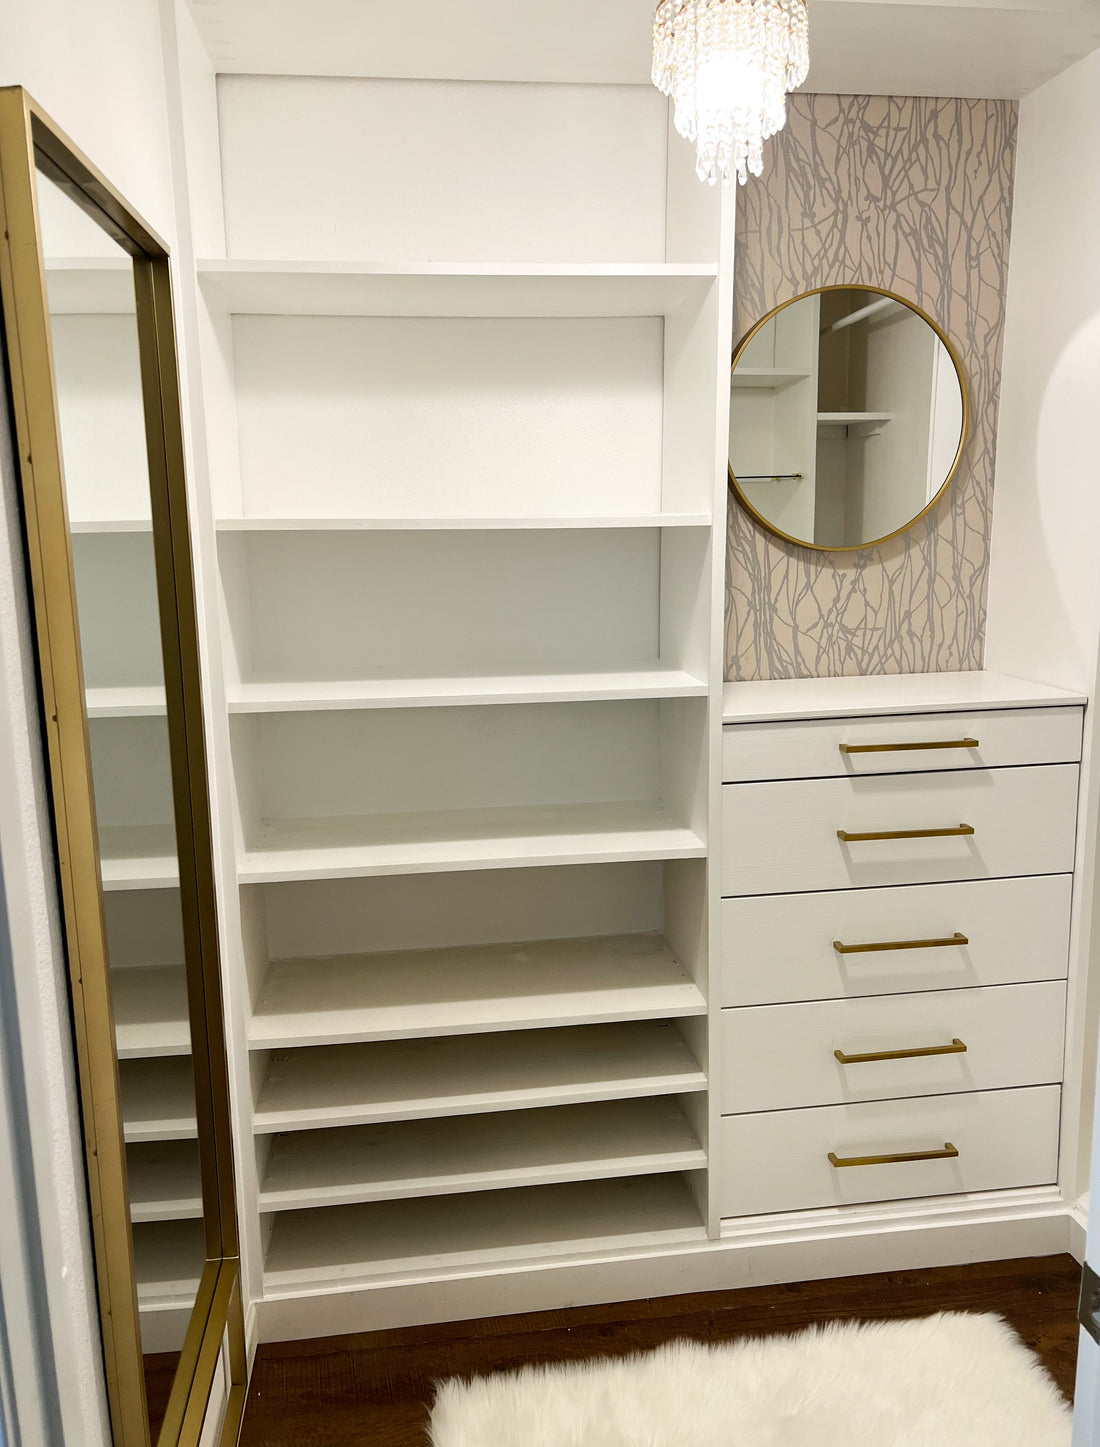
Usually this would be the end of the project where you would add your racks and your clothes back to the closet, However, I continued and added hardware to the dresser and cabinet, flooring, a new light fixture, wallpaper and mirrors. Whew! All in a days work! LOL but it was totally worth it because this closet turned out amazing!

6 comments
You are absolutely amazing and what you do is beyond dope! The fact that you are a WOMAN…girl I’m speechless and motivated!!! Thank you!
This looks absolutely amazing, you did an excellent job and I’m going to use your instructions and do this to my house.
Love it!
You did an awesome job. I love that you shared this. Great job Queen. Many blessings.😍💪🏾👑🙏🏾
Amazing job!
You did that. You have inspired me to try this. Thank you